Pipe insulation is a crucial yet often overlooked aspect of home maintenance. Properly insulating pipes can prevent a variety of issues, such as freezing, bursts, and even energy inefficiency. In regions with harsh winters, freezing pipes can cause significant damage, resulting in expensive repairs and disruption to your daily routine. Additionally, insulating pipes not only protects them from the cold but also helps save energy and reduces heating costs. Whether you’re insulating pipes in your basement, attic, or crawlspace, choosing the right materials and techniques will ensure long-term protection and improved efficiency.
This guide covers the importance of pipe insulation, various materials available, and step-by-step instructions on how to properly insulate your pipes. We’ll also highlight common mistakes to avoid during the installation process to ensure your pipes remain secure and efficient for years to come.
Why Pipe Insulation is Crucial?
Pipe insulation serves three primary purposes: preventing freezing, improving energy efficiency, and safeguarding pipe integrity. In cold climates, uninsulated pipes are prone to freezing, which can lead to costly bursts and water damage. Even in milder regions, insulation reduces heat loss in hot water pipes, cutting energy bills by up to 20%. Additionally, it minimizes condensation, which corrodes metal pipes over time.
Beyond cost savings, insulation reduces strain on water heaters and HVAC systems. For example, insulating hot water pipes can raise water temperature by 2°F–4°F, allowing lower thermostat settings. For cold pipes, insulation prevents moisture buildup that fosters mold growth. Whether in basements, crawl spaces, or exterior walls, insulating pipes is a low-cost, high-reward investment.
Prevent Freezing and Burst Pipes
When water freezes, it expands by 9%, creating pressure that cracks pipes. Burst pipes cause an average of $5,000 in water damage per incident. Insulation alone isn’t enough in sub-zero temperatures; pair it with heat tape in extreme climates. Focus on pipes in unheated areas (e.g., attics, garages).
Energy Efficiency and Cost Savings
The U.S. Department of Energy estimates insulating hot water pipes reduces heat loss by 30%. For a household using 12,000 gallons annually, this saves 1,200–1,500 gallons of heated water. Use insulation with an R-value of at least 3 for optimal performance.
Enhancing the Longevity of Your Pipes
Condensation on cold pipes accelerates rust in steel and pitting in copper. Closed-cell foam insulation blocks moisture, while rubber sleeves protect against abrasion in tight spaces.
Different Types of Pipe Insulation Materials
Foam Pipe Insulation
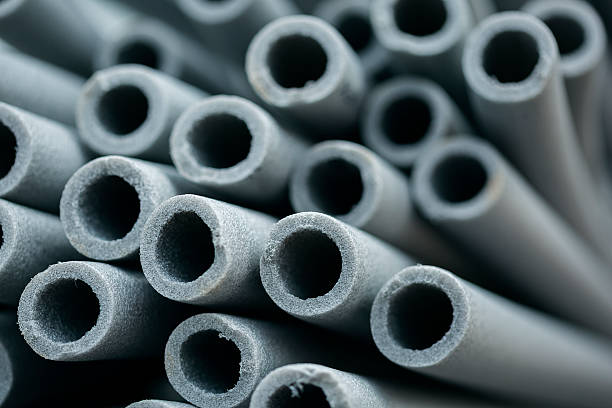
Foam sleeves (polyethylene or
rubber) are affordable and DIY-friendly. They come pre-slit for easy installation and resist moisture. Ideal for indoor use, foam insulates both hot and cold pipes but degrades in UV light.
Installation: Measure pipe diameter, cut sleeves to length, and secure with adhesive or zip ties. Seal seams with foil tape for maximum efficiency.
Fiberglass Pipe Insulation
Fiberglass offers superior thermal resistance (R-4 to R-8) for high-temperature pipes (e.g., boilers). However, it requires gloves/masks during installation due to irritant fibers.
Best for: Attics or basements where heat retention is critical. Wrap fiberglass around pipes and cover with a vapor barrier.
Reflective or Radiant Barrier Insulation
Reflective foil insulation deflects heat, making it ideal for hot climates or preventing heat gain in cold water lines. Often used in conjunction with foam for dual protection.
Installation Tip: Ensure a 1-inch air gap between the foil and pipe to maximize reflectivity.
How to Insulate Pipes: Step-by-Step Guide
Insulating your pipes is a simple and effective way to protect them from freezing in cold weather, reduce energy costs, and prevent potential damage to your plumbing system. Whether you're dealing with hot or cold water pipes, proper insulation can help maintain the desired temperature and prevent costly repairs. This step-by-step guide will walk you through the process of selecting materials, measuring, and installing pipe insulation, ensuring your pipes stay safe and efficient throughout the year.
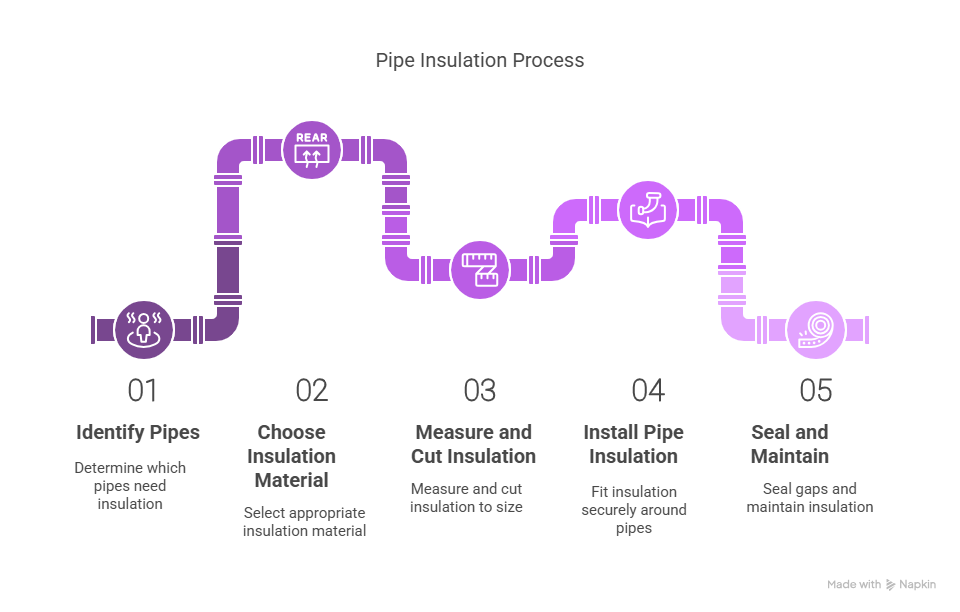
Step 1: Identify the Pipes to Insulate
Begin by identifying the pipes that require insulation. Focus on pipes in unheated areas such as attics, basements, and crawl spaces. These areas are more prone to freezing during cold weather. Also, consider insulating hot water pipes to improve energy efficiency.
Step 2: Choose the Right Insulation Material
There are various materials available for pipe insulation, including foam, fiberglass, rubber, and reflective materials. Foam and rubber are the most commonly used for their ease of installation and thermal properties. Ensure the material is suited for both the pipe size and the temperature conditions.
Step 3: Measuring and Cutting Insulation
Measure the length of the pipe sections you intend to insulate. Use a tape measure to get accurate measurements and mark the insulation material for cutting. Carefully cut the insulation using a utility knife or scissors, making sure the pieces are long enough to cover the entire length of the pipe without gaps.
Step 4: Installing Pipe Insulation
Fit the insulation around the pipes, ensuring it is tightly secured. If using foam or rubber tubing, slide it over the pipes like a sleeve. For other materials, wrap the insulation around the pipes and secure it with adhesive or tape. Be sure that all exposed pipes are fully covered, particularly at joints and elbows.
Step 5: Sealing and Maintenance Tips
After installation, seal any gaps or seams with weatherproof tape or insulation adhesive to ensure maximum effectiveness. Inspect the pipes periodically to check for damage, wear, or gaps in the insulation. Maintain the insulation by replacing any deteriorating sections and ensuring that it remains dry and intact.
Common Mistakes to Avoid When Insulating Pipes
Ignoring Pipe Joints and Elbows
One of the most common mistakes is overlooking pipe joints and elbows. These areas are prone to heat loss or freezing if not properly insulated. Ensure every section of the pipe, including joints and bends, is fully covered.
Using the Wrong Insulation Material
Not all insulation materials are suitable for every type of pipe or environment. For instance, foam insulation may not be appropriate for high-temperature pipes. Always choose the right material based on the pipe type (copper, PVC, etc.) and the environmental conditions.
Inadequate Coverage or Gaps
Leaving gaps or poorly covering the pipes can compromise insulation efficiency. Gaps allow cold air to reach the pipes, defeating the purpose of insulation. Be meticulous about ensuring every inch of the pipe is covered.
Not Securing Insulation Properly
If the insulation is not secured tightly around the pipes, it can slip or shift over time. This leads to exposed areas that are vulnerable to freezing. Use appropriate tape, adhesive, or straps to ensure the insulation stays in place.
Overlooking Ventilation Needs
While it's important to insulate pipes, you should also ensure that ventilation isn't blocked, especially in confined or airtight spaces. Without proper airflow, moisture can build up, leading to mold and mildew growth.
Failure to Seal Insulation Seams
Failing to properly seal seams and edges of the insulation can result in gaps that reduce effectiveness. Use weatherproof tape or sealant to secure the edges and prevent air from entering.
Not Considering Future Access
When insulating pipes, it’s easy to cover everything up, but remember that some pipes may need occasional access for maintenance or repairs. Leave access points or removable covers where necessary to avoid future complications.
Conclusion
Properly insulating your pipes is an essential step in safeguarding your home against costly repairs and energy inefficiencies. By preventing freezing, reducing heat loss, and minimizing condensation, pipe insulation helps extend the lifespan of your plumbing system and reduces your overall energy costs. Whether you’re protecting pipes in unheated spaces or improving energy efficiency in your home, selecting the right insulation material and following the proper installation techniques is crucial for long-term protection. Avoiding common mistakes during the installation process ensures that your pipes remain secure, efficient, and ready to withstand harsh weather conditions. With a little time and effort, you can ensure that your pipes are well-insulated, providing you with peace of mind and saving you from potential disruptions in the future.
FAQs
Foam and fiberglass are the best for preventing frozen pipes, especially in cold climates.
How do I know if my pipes need insulation?
Pipes located in unheated areas like basements, attics, or exterior walls should be insulated.
Can I insulate my pipes myself, or should I hire a professional?
Most homeowners can insulate pipes themselves using DIY materials, but professional help may be needed for complex systems.
How long does pipe insulation last?
Pipe insulation can last for 5-10 years, but it depends on the material and environment.
Does insulating my pipes save money on my energy bill?
Answer: Yes, insulating your pipes can significantly reduce energy costs by preventing heat loss.


